The Best Way to Learn Calligraphy Step by Step
If you’ve ever found yourself asking, “What’s the best way to learn calligraphy?” — you’re not alone. With so many pens, styles, tutorials, and conflicting advice out there, it’s easy to feel overwhelmed before you even make your first stroke.
The good news? You don’t need fancy tools, perfect handwriting, or hours of free time to get started. What you do need is a clear path, a bit of patience, and a willingness to enjoy the process.
In this guide, you’ll learn the best way to learn calligraphy — from choosing tools to building skills step by step — so you can stop Googling and start lettering.
Tap to jump to a topic:
And don’t forget to grab your FREE download!
First, What Is Calligraphy, Anyway?
Before diving into the how, it’s helpful to understand what calligraphy actually is.
At its core, calligraphy is the art of beautiful, intentional lettering. Unlike cursive handwriting, which is about speed and utility, calligraphy is about form, rhythm, and style. It can be created with brush pens, dip pens, markers, or even digitally on a tablet.
There are many styles, but here are a few common ones:
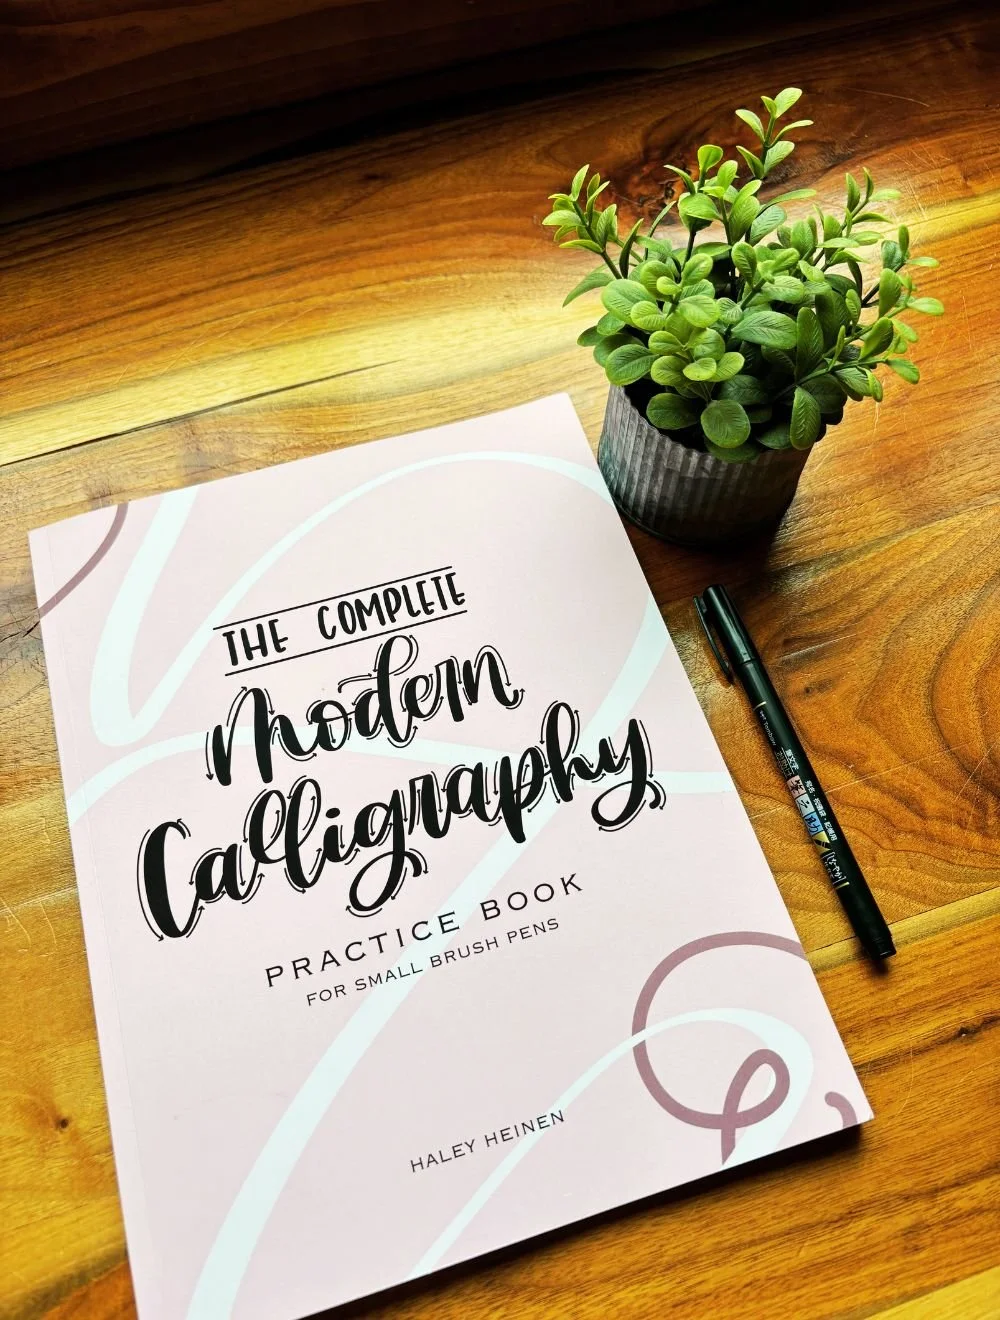
Modern Brush Calligraphy – Created with brush pens or paintbrushes; casual and expressive
Traditional Pointed Pen Calligraphy – Created with a dip pen and ink; elegant and formal
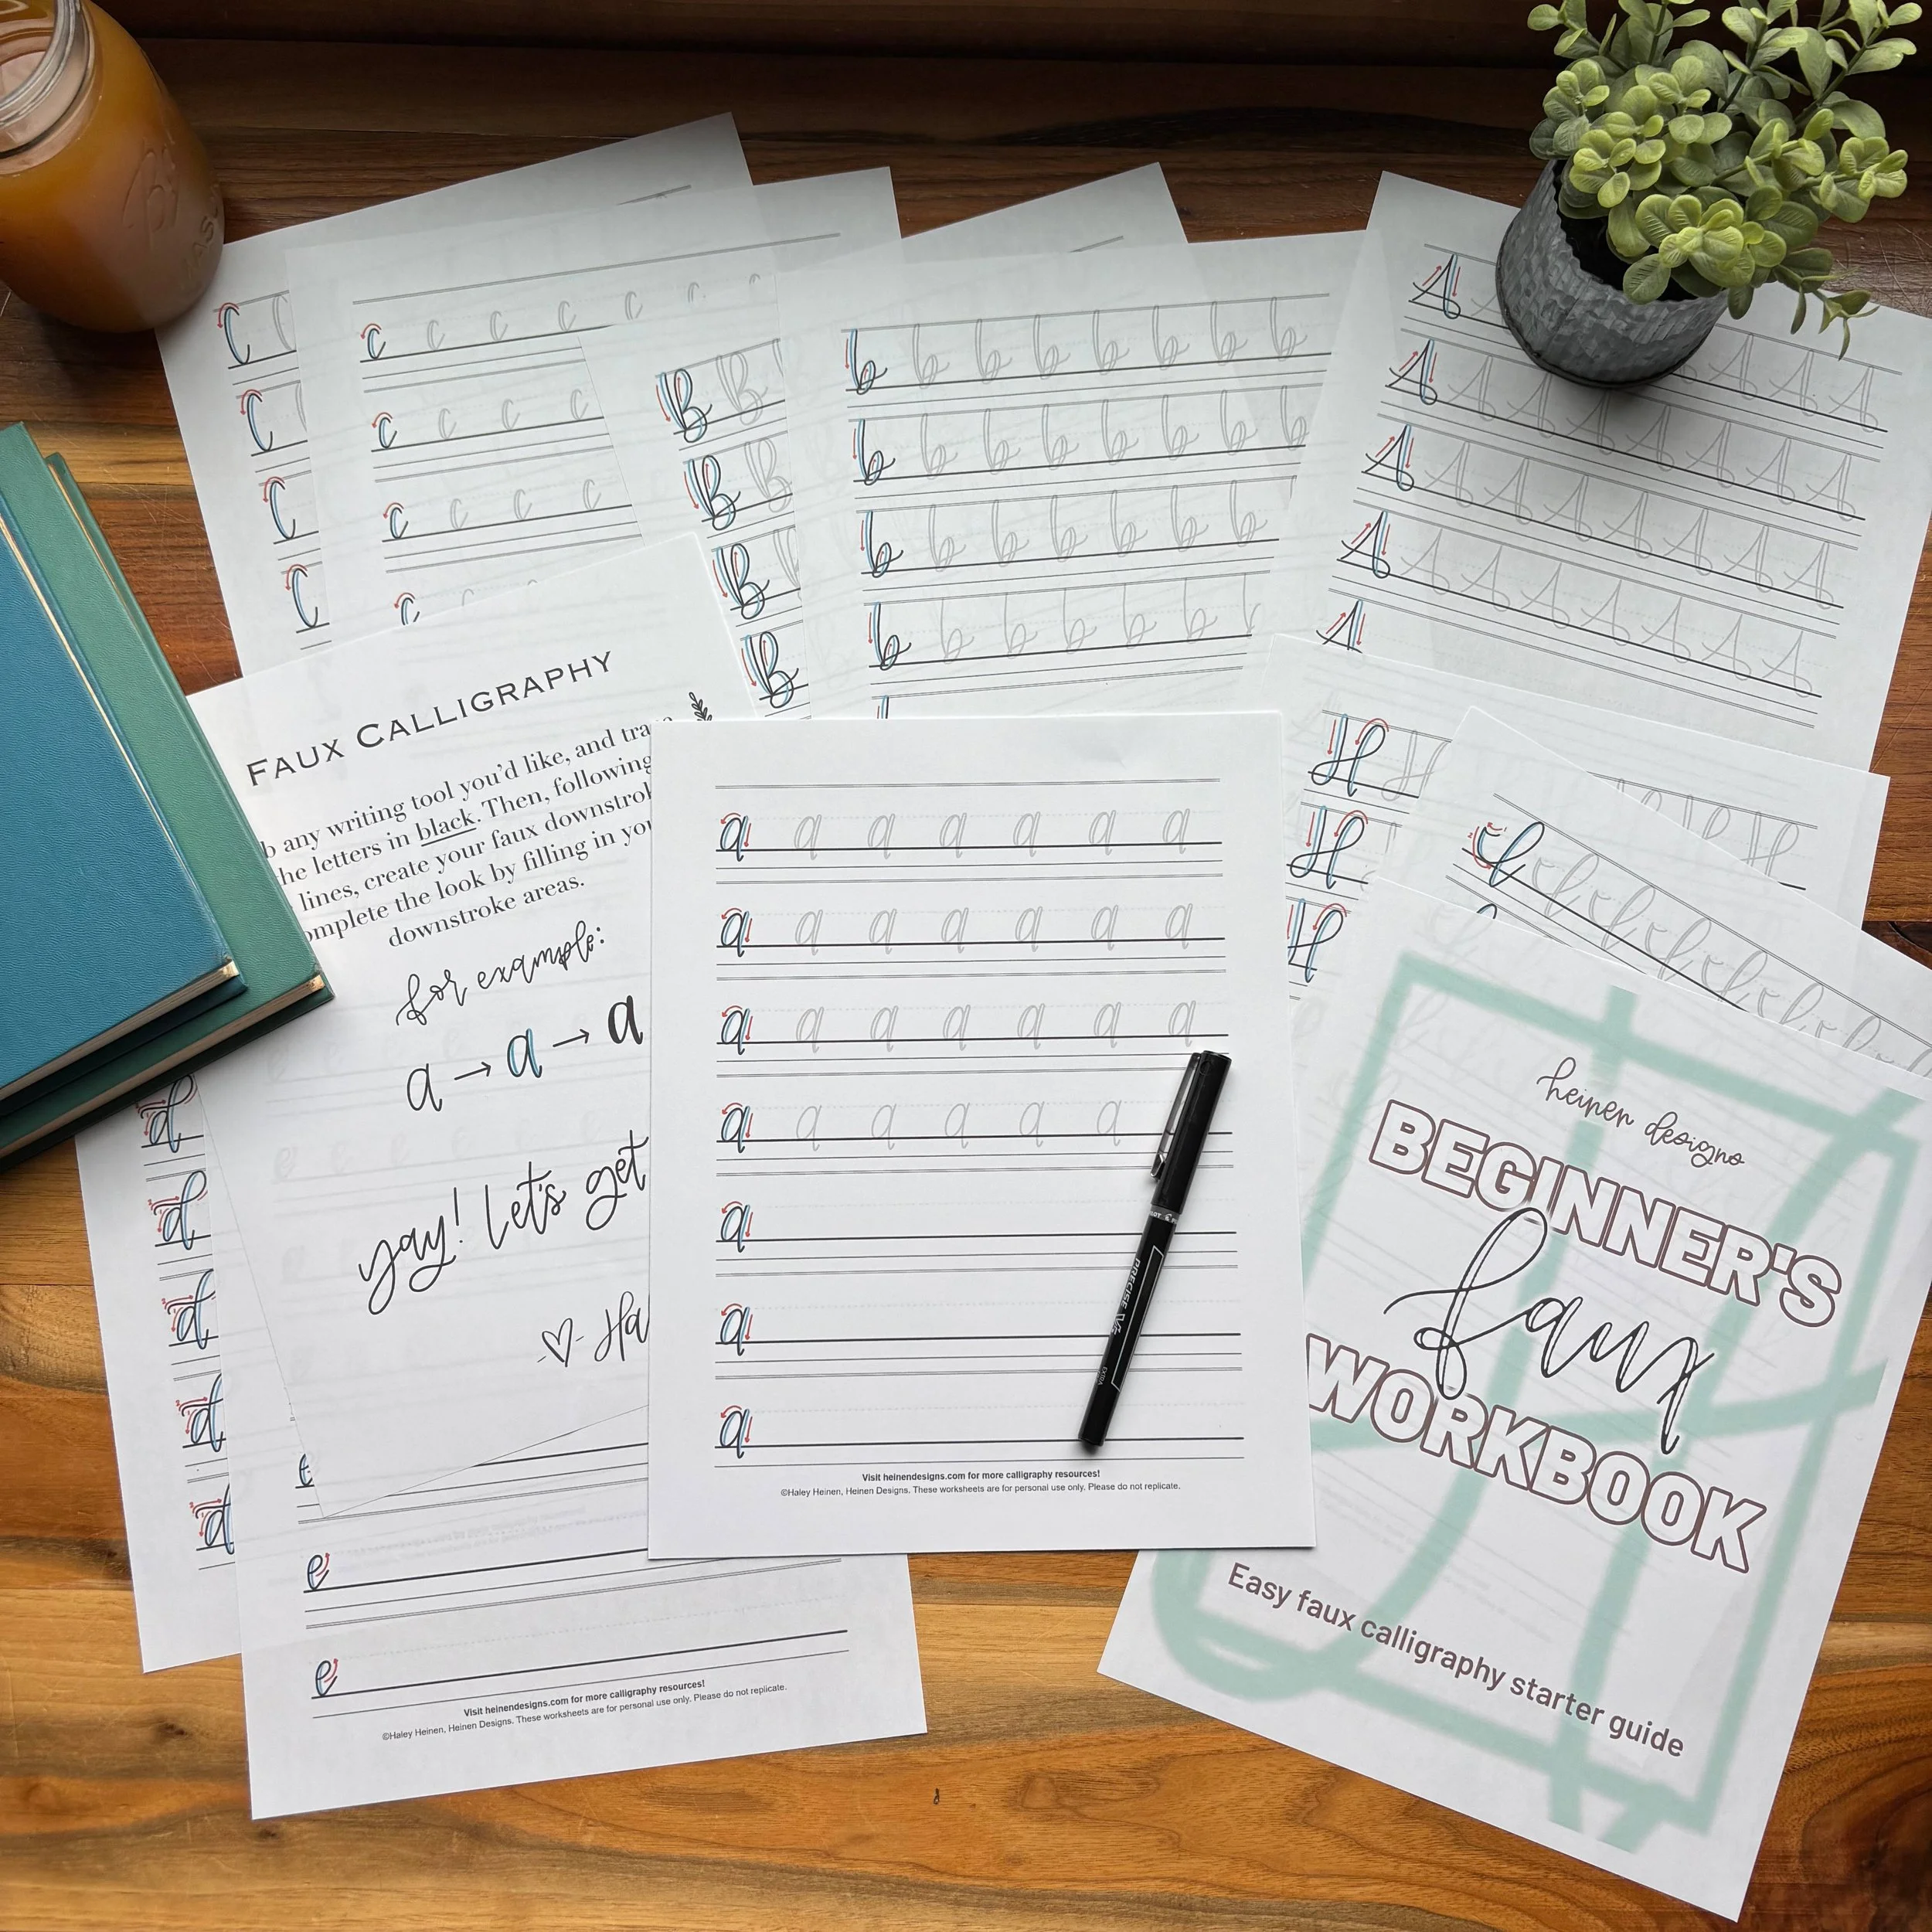
Faux Calligraphy – Mimics the look of calligraphy using regular pens or pencils
Digital Calligraphy – Done on a tablet using apps like Procreate
For this post, we’ll focus on modern brush calligraphy, since it’s one of the most beginner-friendly and doesn’t require ink spills or special nibs to get started.
The Best Way to Learn Calligraphy (Step-by-Step)
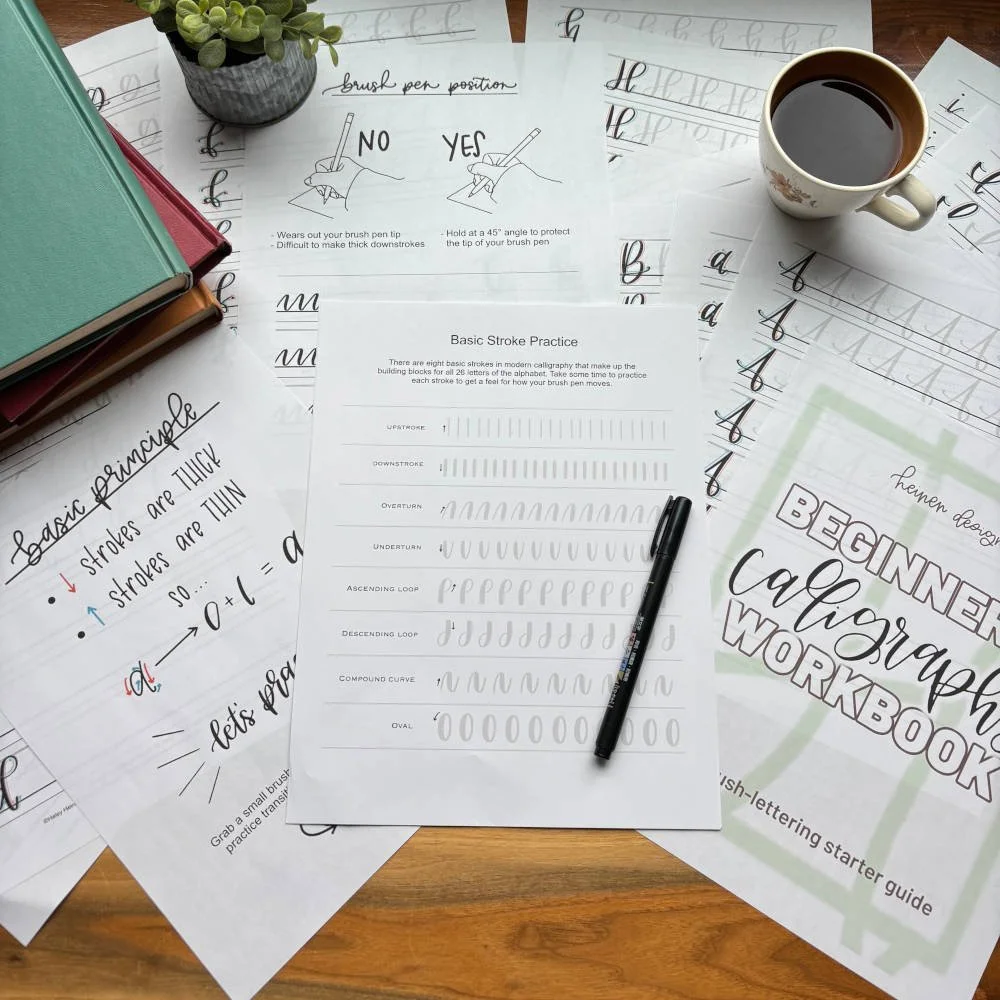
1. Start with the Right Tools (Not the Most Expensive)
When you’re just starting out, you don’t need a drawer full of pens. In fact, too many tools can slow you down. Here’s what we recommend for beginners:
Brush Pens:
Tombow Fudenosuke (hard or soft tip) – A favorite for beginners and experts alike
Pentel Sign Pen with Brush Tip – Great control and smooth ink flow
Paper:
Use smooth, bleed-proof paper like Rhodia Dot Pads or HP Premium 32lb laser paper.
Avoid regular printer paper. It can fray your pen tips and bleed ink.
Simple tools let you focus on learning technique, not fighting your supplies.
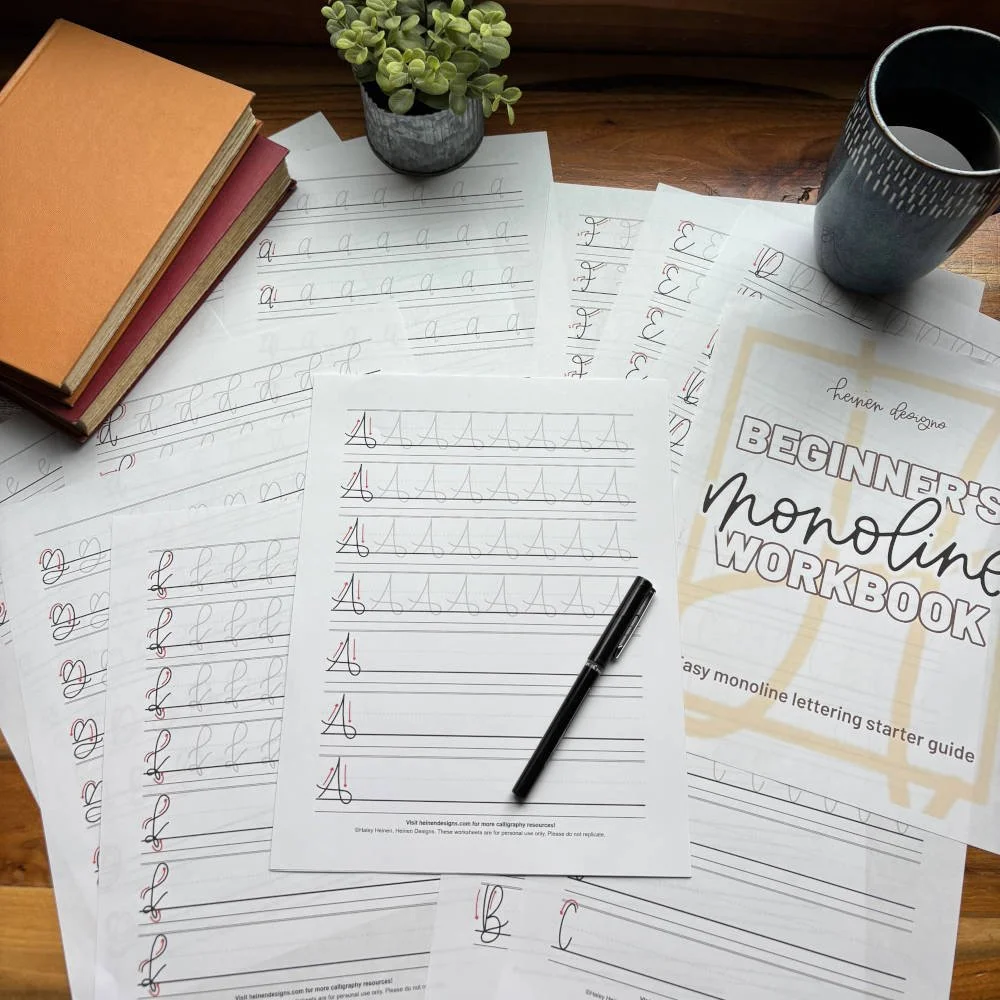
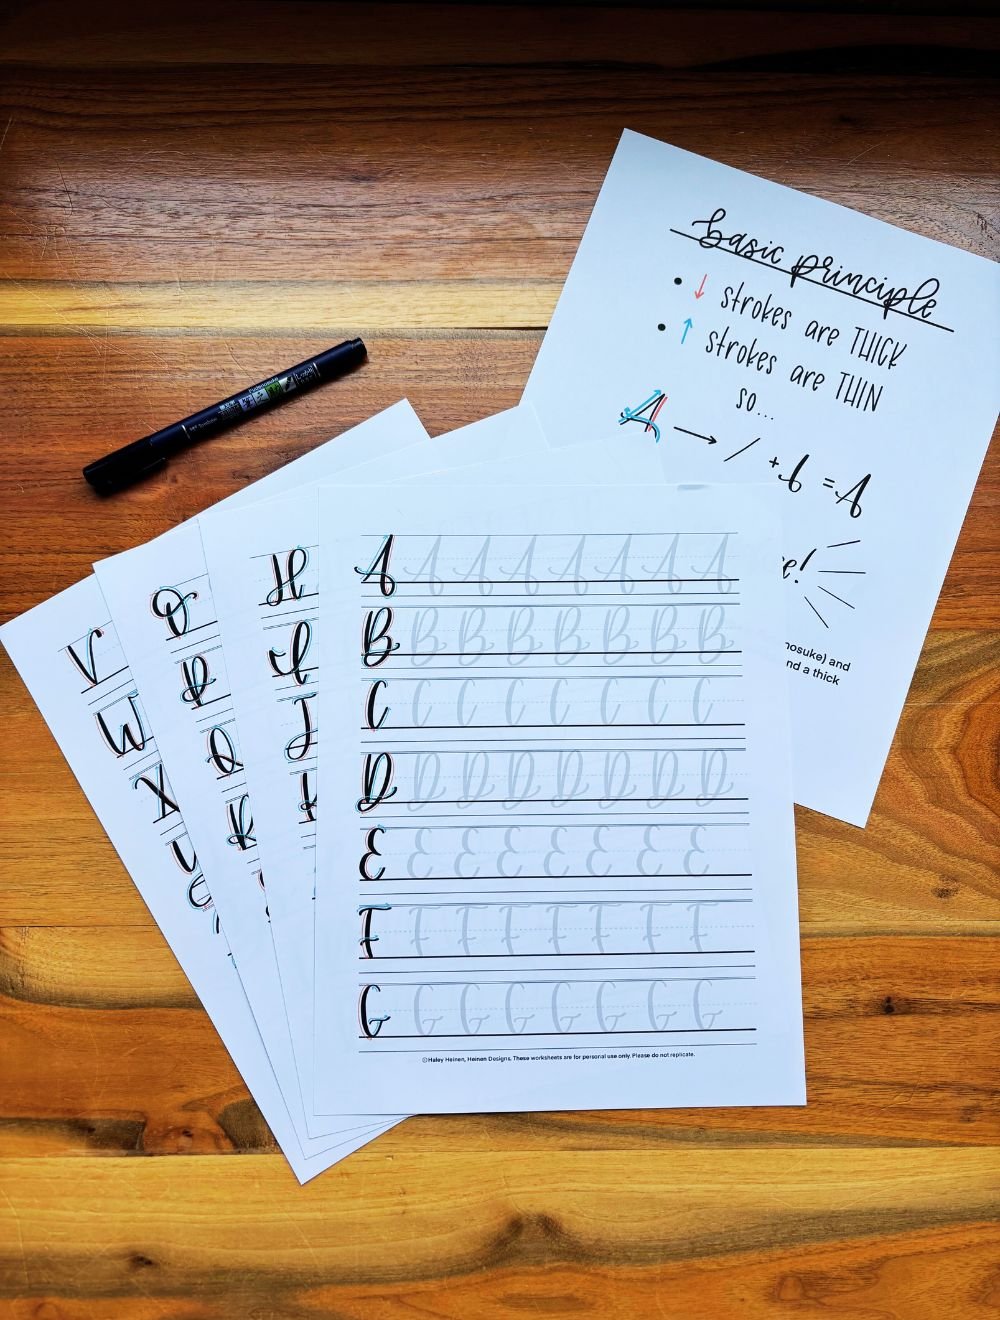
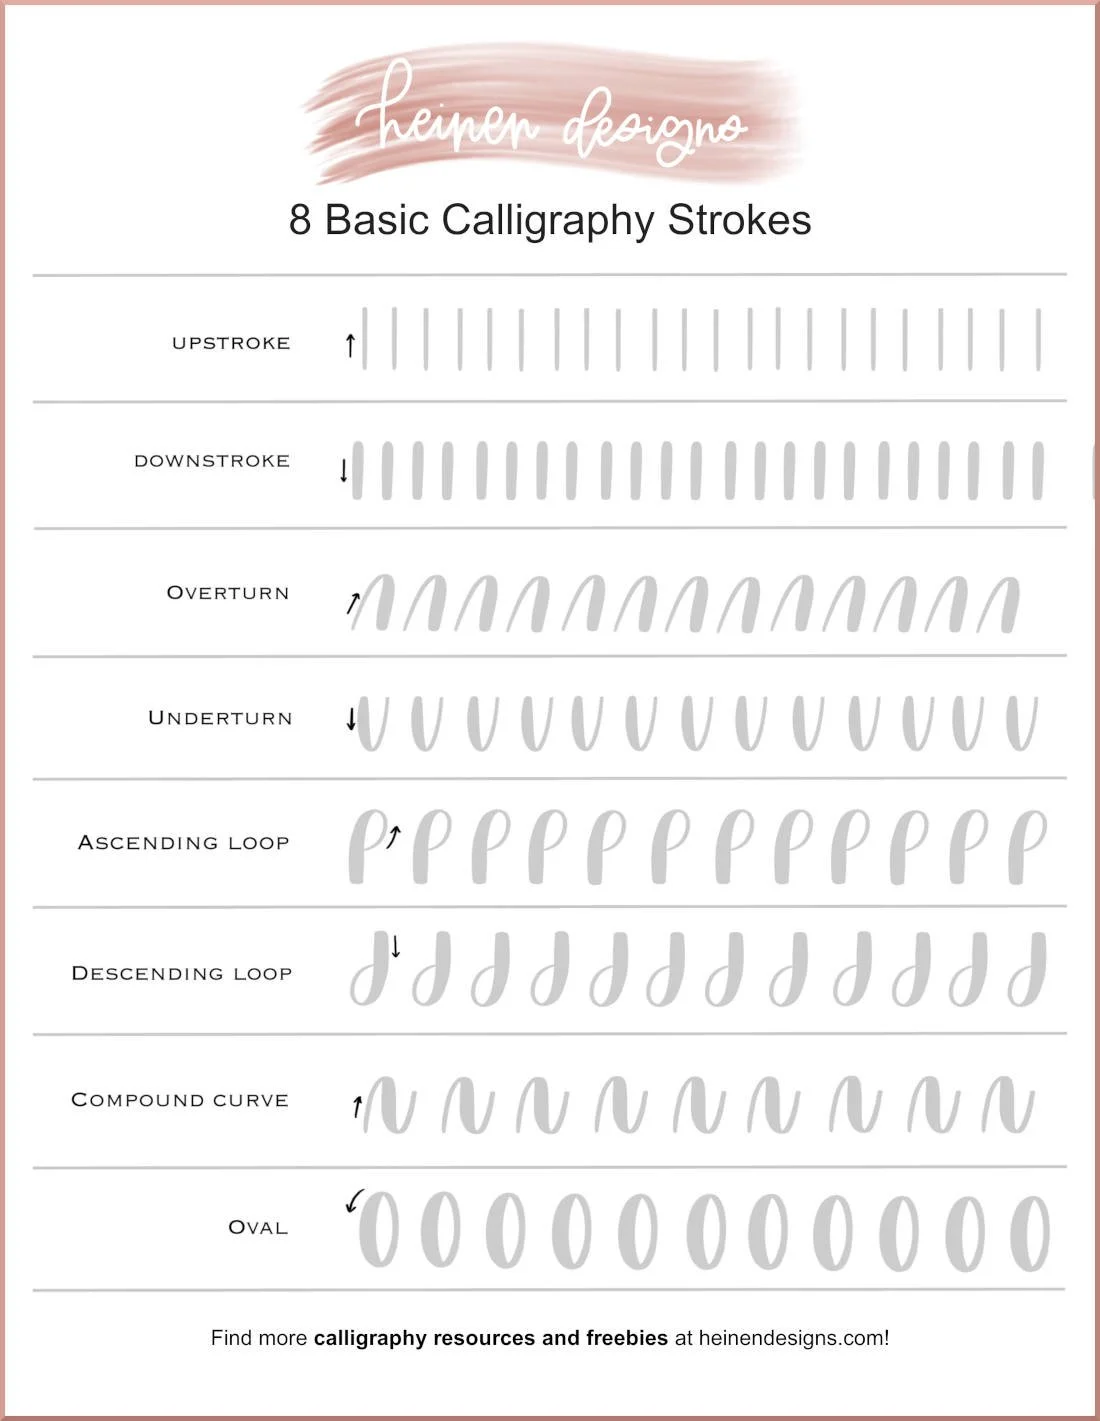
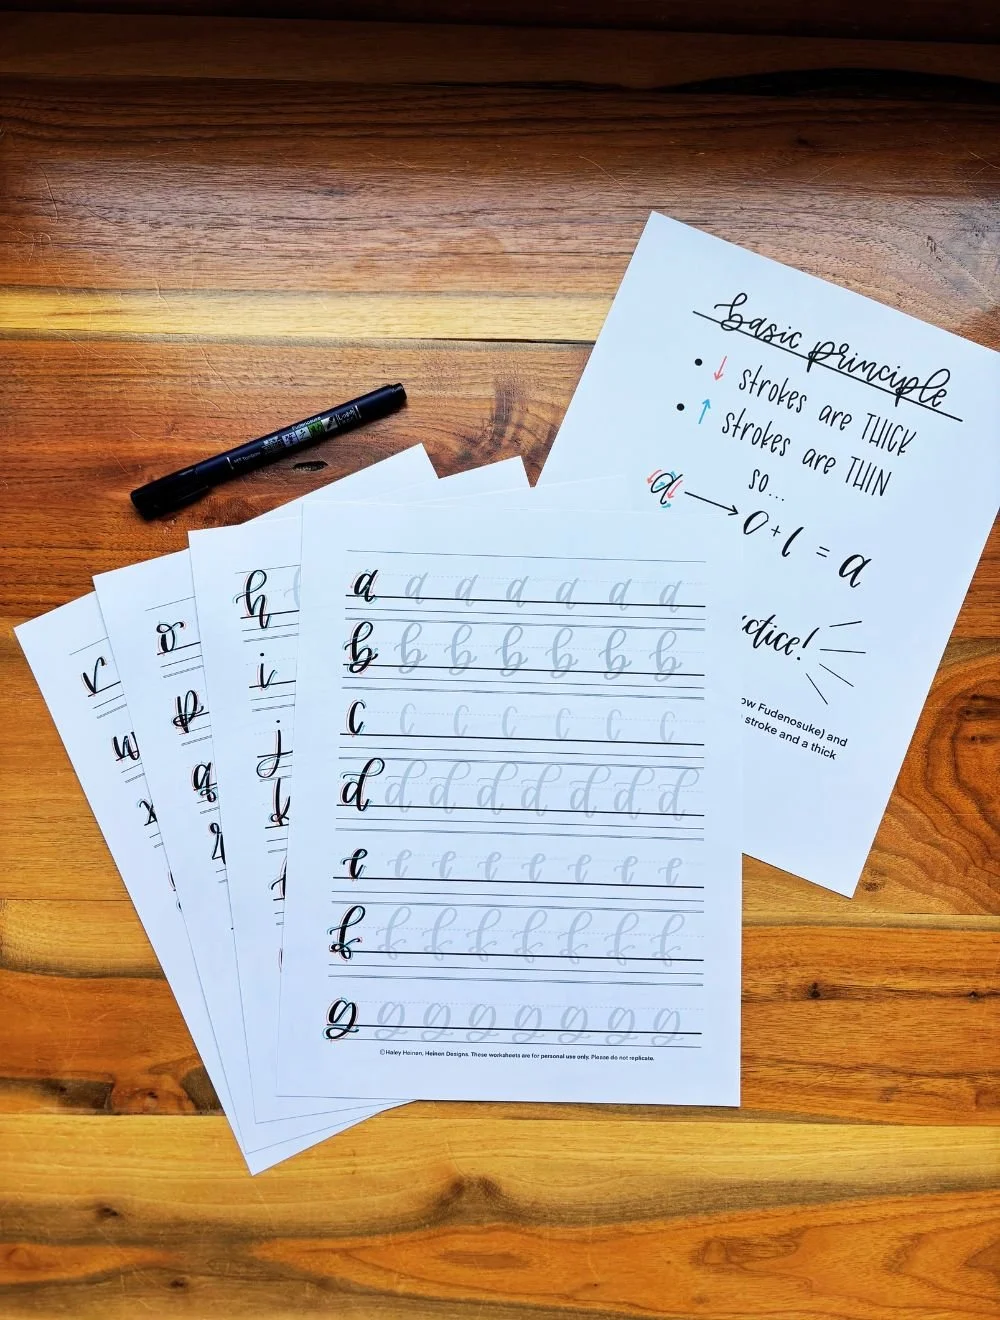
2. Learn the Basic Strokes First
Every calligrapher starts with the basic strokes and for good reason. All letters in brush calligraphy are built from eight foundational strokes like upstrokes, downstrokes, underturns, and ovals.
These strokes teach you how to control pen pressure, stroke direction, and line consistency — all critical for beautiful lettering.
Tip: Practice rows of one stroke at a time. Go slow. Focus on making each stroke consistent, not perfect.
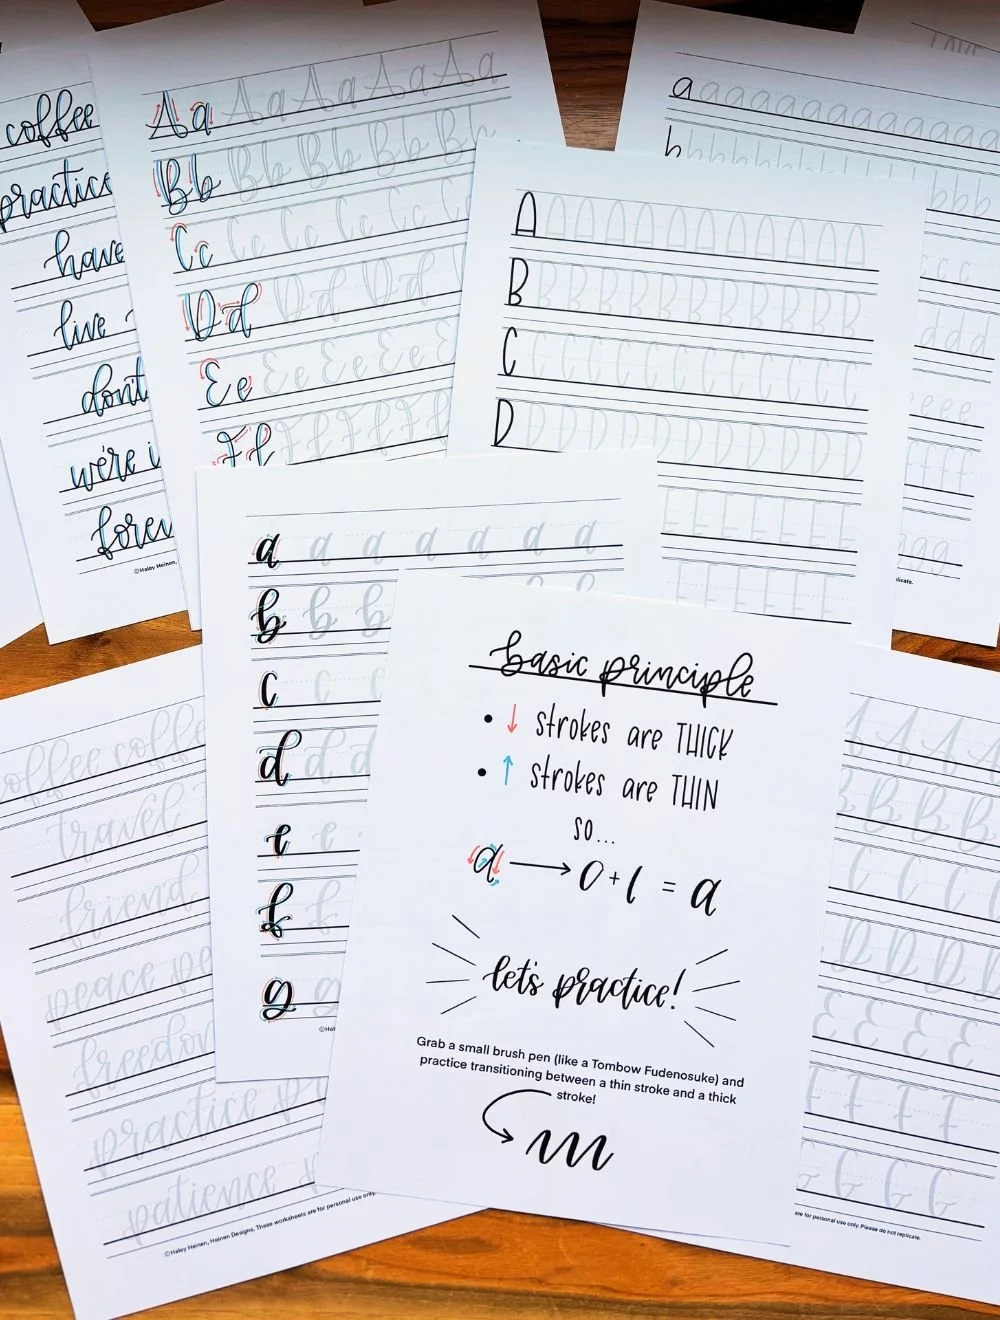
3. Practice Individual Letters Slowly
Once the strokes feel familiar, it’s time to combine them into letters. Start with lowercase letters before diving into uppercase. They’re simpler and more commonly used.
Break the alphabet into small groups:
Round and oval-based letters like a, c, and o
Letters with simple curves and turns like m, n, t, u, v, and w
Letters with more loops like e, j, l, s, and x
Letters with combinations of curves and loops like b, d, g, y, and z
More complex letter forms and connections like f, p, and q
Go letter by letter. Don’t rush to write full words just yet. Mastering form first will save you from frustration later.
Start learning today:
4. Connect Letters into Words
This is where the fun really begins!
After you’re comfortable with individual letters, begin practicing simple word connections like:
“hi”
“love”
“happy”
“create”
Pay attention to spacing between letters (also called kerning) and how each letter transitions to the next. Keep it loose and natural. Modern calligraphy often embraces a little bounce and personality.
5. Learn Layout & Composition Basics
Once you're lettering words, you’ll start thinking about how those words look on the page.
Learn the basics of layout:
Centered vs. staggered compositions
Word balance and weight
Adding flourishes or embellishments tastefully
You can explore layout with projects like:
Handmade cards
Envelope addressing
Lettered quotes for wall art
6. Practice Consistently (Not Perfectly)
Here’s the secret to learning calligraphy: consistency beats perfection every time.
You don’t need to practice for hours. Even 10–15 minutes a day builds muscle memory. Schedule small practice sessions and use guided worksheets or drills to stay focused.
Need motivation? Join a 30-day lettering challenge or create a “progress journal” to track your improvement.
How to Stay Motivated as You Learn
It’s easy to get discouraged when your work doesn’t look like your favorite Instagram artist’s — yet. But everyone starts somewhere.
Here’s how to stay inspired:
Follow artists who share process videos, not just finished pieces
Join online lettering groups on Facebook, Instagram, or Reddit
Celebrate your progress by saving your early work. You’ll be amazed later!
Letter things you care about, like favorite quotes, names, lyrics, or verses
Calligraphy becomes more enjoyable when you let it reflect you.
Common Beginner Mistakes to Avoid
If you’re brand new to calligraphy, don’t worry — mistakes are part of the process. But here are a few to watch out for:
Jumping straight to full quotes before learning the strokes
Buying tons of expensive supplies too soon
Comparing your Day 1 to someone else’s Year 5
Rushing through drills just to “check the box”
Instead, slow down, stay curious, and trust the process. Check out our complete list of beginner mistakes to learn how to avoid them!
You Can Learn Calligraphy — Start Today!
Calligraphy isn’t just for artists or people with perfect handwriting. It’s a skill, and skills can be learned, with the right steps and the right mindset.
So if you’ve been wondering how to start, the answer is simple:
Grab a brush pen.
Print a basic strokes sheet.
Give yourself 10 focused minutes today.
You’ve got everything you need. The rest will come with practice.
And be sure to grab your FREE downloadable worksheet below!