The Easiest Way to Learn Hand-Lettered Calligraphy Step-by-Step

If you’re here, you’re probably asking: “What’s the simplest, most straightforward way to learn hand-lettering?”
No fluff. No frills. Just a clear path to writing beautiful letters — with as little stress as possible.
You're in the right place. In this guide, you'll learn how to start with monoline calligraphy — the easiest style for beginners — and exactly how to build your skills step by step.
Tap to jump to a topic:
Why Monoline Calligraphy Is the Best Starting Point
Forget ink spills, fancy pens, or pressure techniques. If you want to learn lettering quickly and confidently, monoline is the way to go.
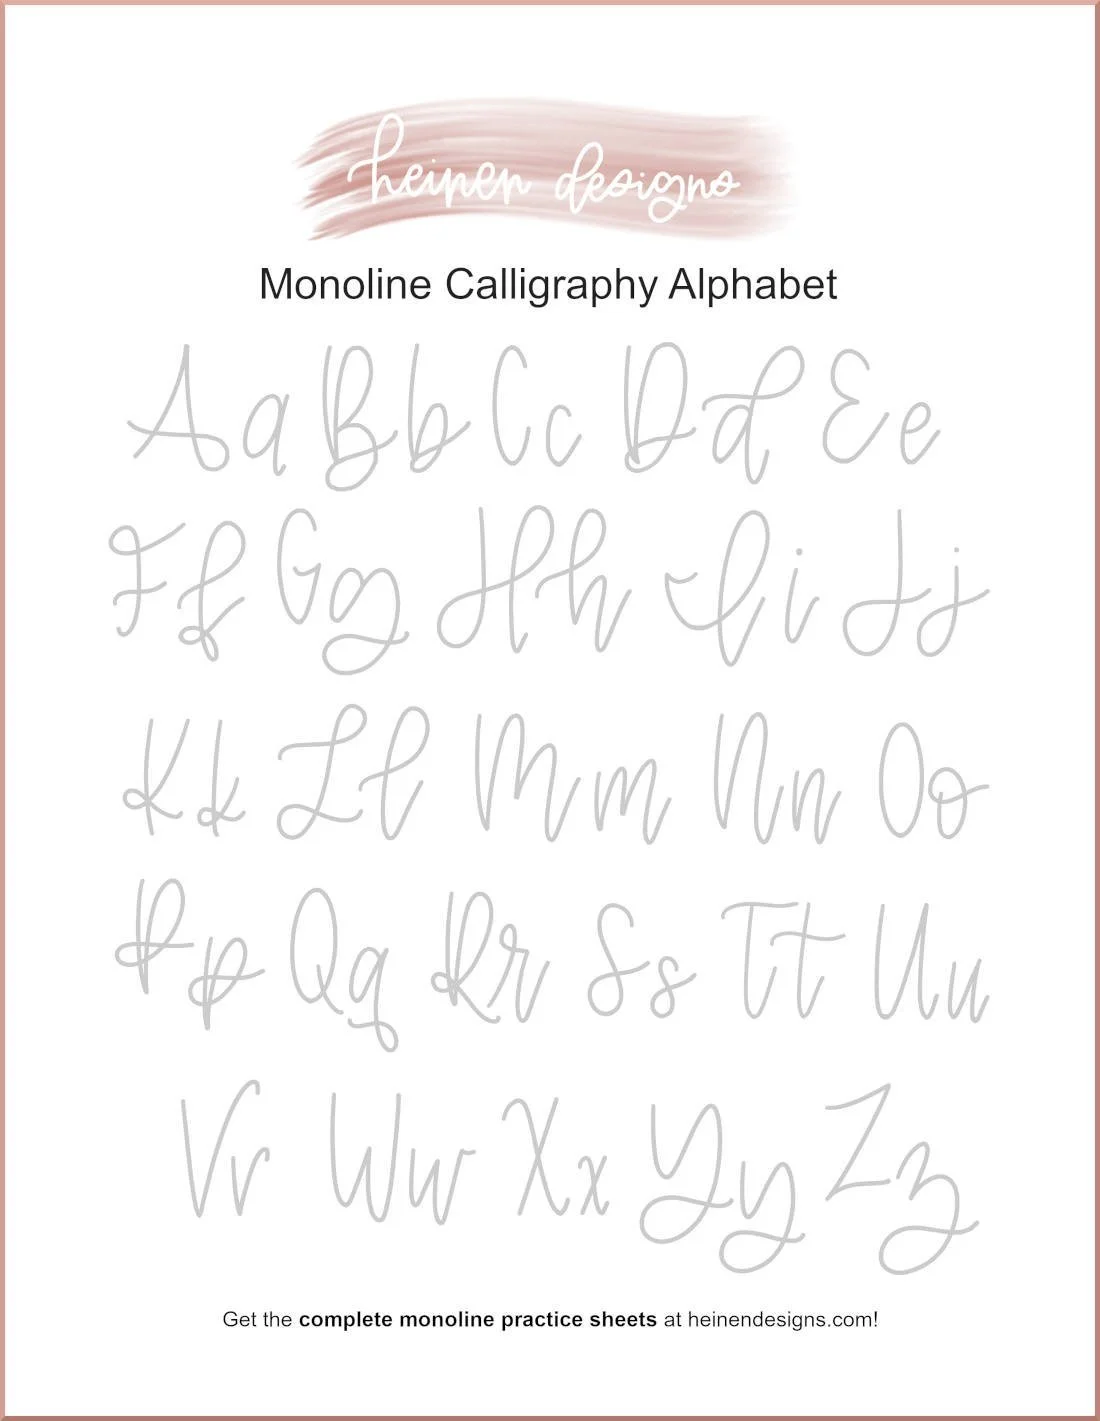
What is Monoline Calligraphy?
Monoline is a lettering style where each stroke is the same thickness. No pressure sensitivity, no brush pens — just clean, consistent lines.
Why it’s the easiest to learn:
Uses simple tools (any pen or pencil works)
No pressure control required
Teaches core skills like shape, spacing, and rhythm
Faster to learn than brush or dip pen calligraphy
Perfect foundation for other lettering styles later on
You can learn it with a ballpoint pen, gel pen, fineliner, or even an Apple Pencil (but we don’t recommend this if you’re looking for the easiest possible learning path.
Learn more about pen types with our complete guide to calligraphy pens.
Start Learning Now!
How to Get Started with Easy Calligraphy
Monoline calligraphy is the perfect starting point for beginners because it removes the most frustrating part of traditional calligraphy: pressure control. Instead of worrying about thick and thin strokes, you’ll focus purely on letter shapes, consistency, and spacing — the real foundation of good lettering.
Even better? You only need one pen and a little bit of time each day.
Below is a simple, step-by-step process to help you go from total beginner to confident lettering artist, the easiest way possible.
Step 1: Choose a Monoline Tool (Just One)
One of the biggest mistakes beginners make is thinking they need a bunch of fancy tools to start lettering. That’s simply not true. In fact, the best thing you can do is pick just one simple pen and stick with it.
The beauty of monoline calligraphy is that you don’t need pressure-sensitive tools. Since every stroke is the same width, you can use almost any writing instrument you already have. The key is to choose something that feels smooth, comfortable, and gives you a clean line.
Great beginner options include:
Micron or Pigma pens (sizes 01–05): Smooth, archival-quality fineliners that glide easily on the page.
Sharpie Pen (not marker): A surprisingly reliable tool for clean monoline strokes.
Pilot G2 gel pens: Widely available and easy to control.
Mechanical pencil: Great for sketching and practice, especially if you want to erase.
Apple Pencil or stylus (if you're using Procreate or another digital lettering app): Perfect for digital practice with a monoline brush.
What to look for in your pen:
A consistent, fine to medium tip (not a brush tip)
Smooth ink flow (no scratchy textures or skips)
Comfort in your hand (especially for longer sessions)
After you choose your pen, resist the urge to keep testing different ones. Part of what makes this process easy is reducing decisions and distractions. You don’t need to chase the “perfect” tool. You just need one that works, and then focus your energy on practicing.
Step 2: Learn Basic Letter Shapes First
Before you dive into full words or complex layouts, it’s important to build your foundation, one letter at a time. Learning the shapes of lowercase letters is where everything starts in monoline calligraphy. This step helps you develop the rhythm, balance, and consistency that define great lettering.
Why Start with Lowercase Letters?
Lowercase letters are typically more fluid and repetitive than uppercase letters, which makes them ideal for building muscle memory. Most lowercase forms are built from a small set of repeated shapes, like ovals, loops, and straight lines. Once you learn those, the rest of the alphabet becomes much easier to grasp.
How to Practice:
Trace first: Start by tracing letterforms using a guided worksheet. This helps train your hand to follow the correct proportions and curves without worrying about "getting it right" immediately.
Freehand next: Once you’ve traced a letter several times, try drawing it on your own underneath or beside the traceable version. Focus on spacing, line quality, and consistency.
Repeat for each letter group: Move through the alphabet gradually. Don’t rush it. You’re not just memorizing letters, you’re training your muscle memory.
Pro tip: Don’t feel like you have to master every letter before moving on. Lettering is iterative. You’ll revisit and improve each shape as you progress. The key is progress over perfection.
Step 3: Practice Simple, Repeating Drills
Now that you’ve started learning individual letter shapes, it’s time to build control, rhythm, and consistency through drills. These aren’t boring busywork — they’re the secret to developing muscle memory, improving your spacing, and building fluidity in your strokes.
Even though monoline calligraphy doesn’t use pressure variation, your hand still needs to learn how to move steadily and intentionally. Drills help you develop those skills much faster than jumping straight into full words or projects.
What Are Monoline Drills?
They’re short, repeatable stroke patterns that train your hand to:
Maintain consistent shapes and spacing
Develop steady motion and line control
Prepare for letter connections and word flow
Think of drills as your calligraphy warm-up, just like a musician practices scales or an athlete stretches before training.
Recommended Monoline Drills:
Here are a few beginner-friendly drills that are simple but highly effective:
Oval Loops
Draw small, even ovals across the page (like the body of an “o” or “a”). Focus on making them the same size and shape, evenly spaced.
Underturns & Overturns
These are the entry/exit strokes found in letters like “u,” “n,” “m,” and “r.” Practice them over and over, with a light curve at the base or top.
Horizontal Lines
Draw straight horizontal lines across the page. This builds arm control and steadiness, especially for crossbars on “t,” “e,” and “f.”
Vertical Lines
Draw evenly spaced vertical strokes, like lowercase “l” or “i” stems. Aim for consistent height and spacing.
Basic Connections
Practice connecting “i” and “u” repeatedly to mimic flowing, cursive-like patterns—e.g., “iu,” “ui,” “iuu.” These mimic the movement of real words and improve flow.
Learn more about basic calligraphy strokes
How to Use These Drills:
Warm up with 1–2 drills before starting any lettering session.
Set a timer for 5–10 minutes and repeat one drill at a time across the page.
Slow down and focus on quality, not speed.
Use a guide or worksheet to keep your sizing and spacing consistent.
Even just 10 minutes of drills a few times per week can dramatically improve your control and make your letters feel more natural and effortless.
Step 4: Build Real Words from Simple Connections
Once you’re feeling more confident with your letterforms and drills, it’s time to start putting letters together into words. This is where your practice starts to feel more real — and a lot more fun!
Start small. Choose simple, short words made from letters you’re already familiar with. Think: “hi,” “fun,” “loop,” “moon,” “call,” “rise.”
These give you practice with common letter pairings and spacing between strokes.
Tips for connecting letters smoothly:
Keep spacing consistent: Too much or too little space between letters can throw off the balance of your word. Use your drill muscle memory to guide spacing.
Flow through the baseline: Think of your letters as sitting on a gentle line that guides your pen left to right. Avoid jerky stops or exaggerated slants.
Lift your pen when needed: You don’t have to write every word in one continuous stroke. Lifting your pen strategically can lead to cleaner, more intentional shapes.
Start with lowercase only. Once you feel confident connecting letters into words, you can slowly start incorporating uppercase letters or building longer phrases. But don’t rush it! The more time you give to this step, the stronger your base will be for everything that comes next.
Step 5: Stick to a Minimal, Consistent Practice Routine
If you really want to improve fast — and with as little frustration as possible — consistency is your secret weapon. You don’t need to practice for hours every day. In fact, you’ll get better results with just 10–20 minutes a day than with one long session once a week.
Here’s a simple, no-pressure routine to follow.
Your 5-Day Beginner Practice Plan:
Day 1: Warm-up drills + 3–5 lowercase letters
Day 2: Continue lowercase letters + repeat drills
Day 3: Practice 2-letter combinations (ex: “lo,” “at,” “me”)
Day 4: Practice 3–4 letter words (ex: “loop,” “call,” “mini”)
Day 5: Review everything + free practice or a small project (like your name or a quote)
Optional: Use weekends to rest or repeat favorite drills. The goal is not perfection. It’s building momentum and comfort with the process.
Set a timer, turn on some music, and treat this like a creative reset, not a chore.
Step 6: Avoid Common Beginner Pitfalls
Even with the simplest approach, there are still a few traps that can slow you down or frustrate your progress. Here’s what to watch for:
Mistake 1: Overcomplicating Your Tools
You don’t need 10 pens and 4 kinds of paper. Stick with one pen and smooth, printer-weight paper. Focus on the letters, not the supplies.
Mistake 2: Jumping Between Styles
It’s tempting to explore brush lettering, faux calligraphy, and other styles all at once. Don’t. Monoline is the easiest, and it’s enough to build a real foundation. Master one style first, then explore.
Mistake 3: Skipping Drills
Yes, they can feel repetitive. But drills are what make your letters feel confident and fluid. Even 5 minutes a day makes a difference over time.
Mistake 4: Expecting It to Look “Perfect”
This is the biggest mindset block. Lettering is a skill, not a talent, and like any skill, it gets better with focused, repeated practice. Don’t compare your Day 1 to someone else’s Year 5.
Keep it simple, trust the process, and let your consistency do the work.
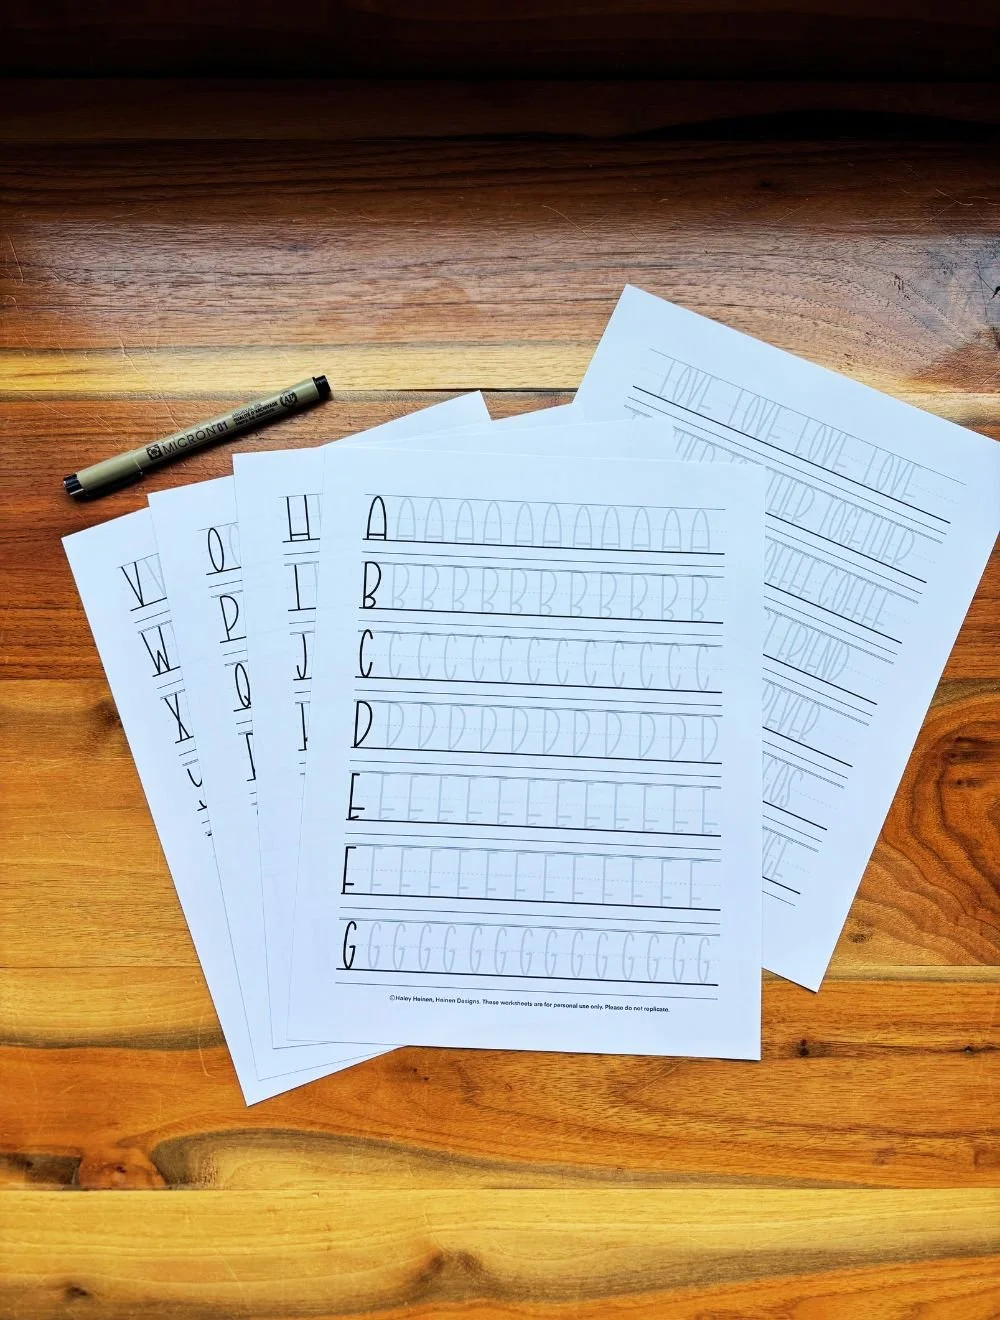
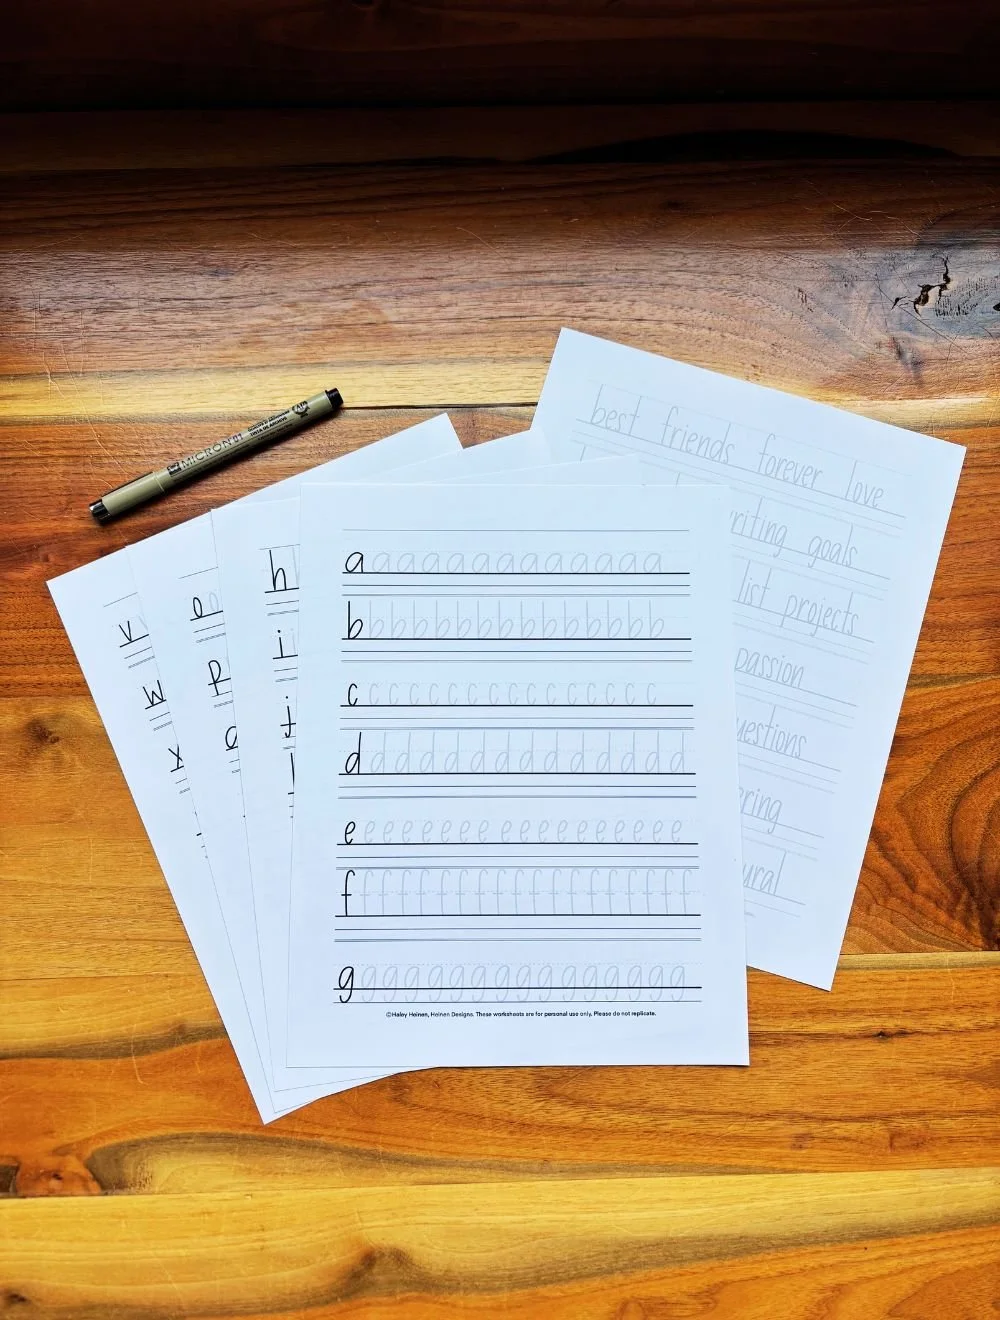
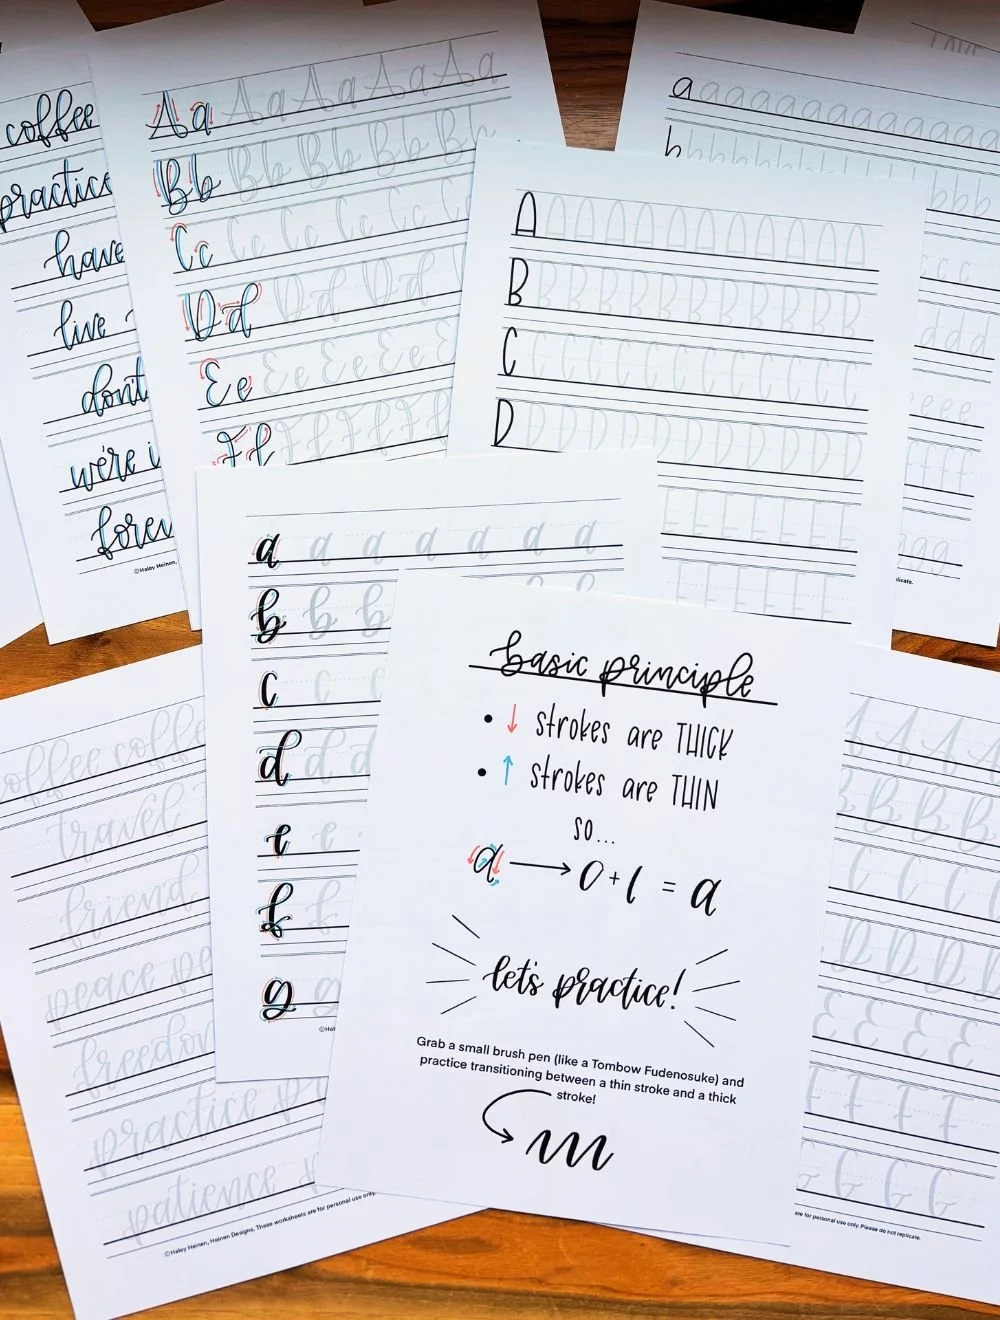
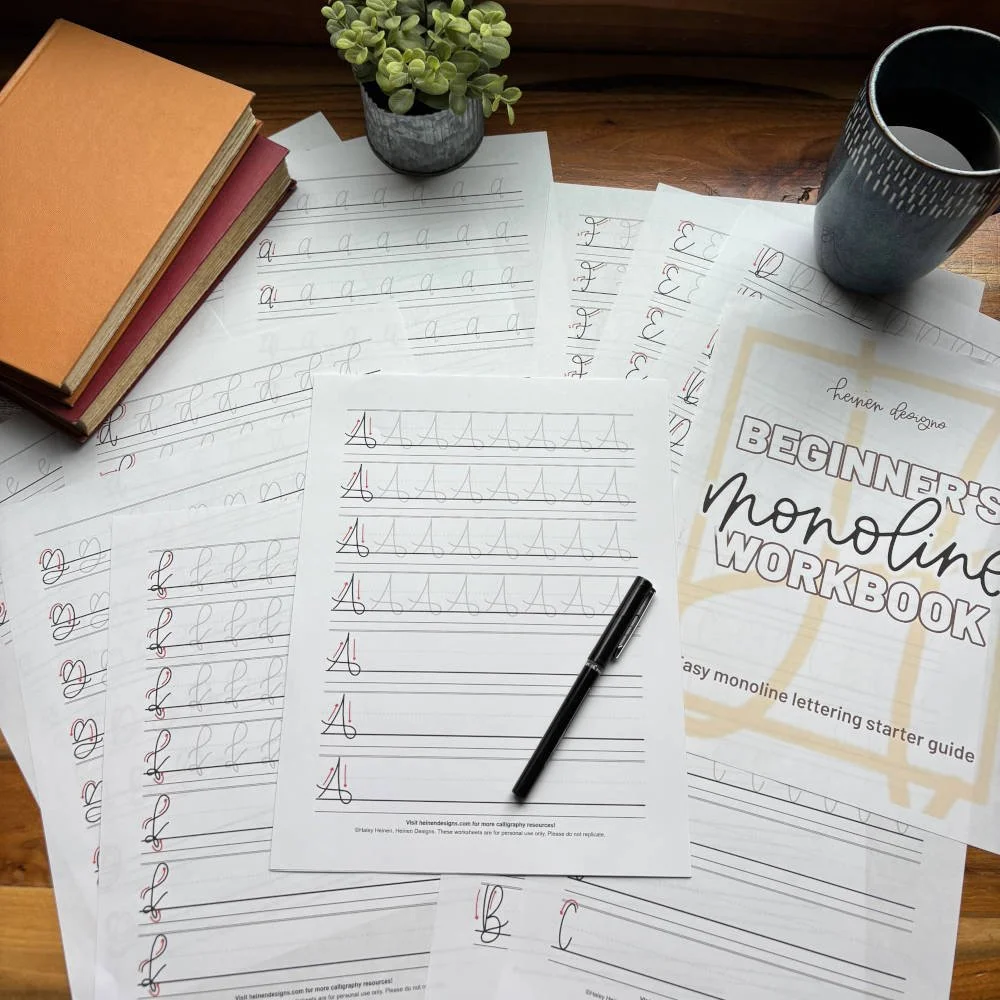
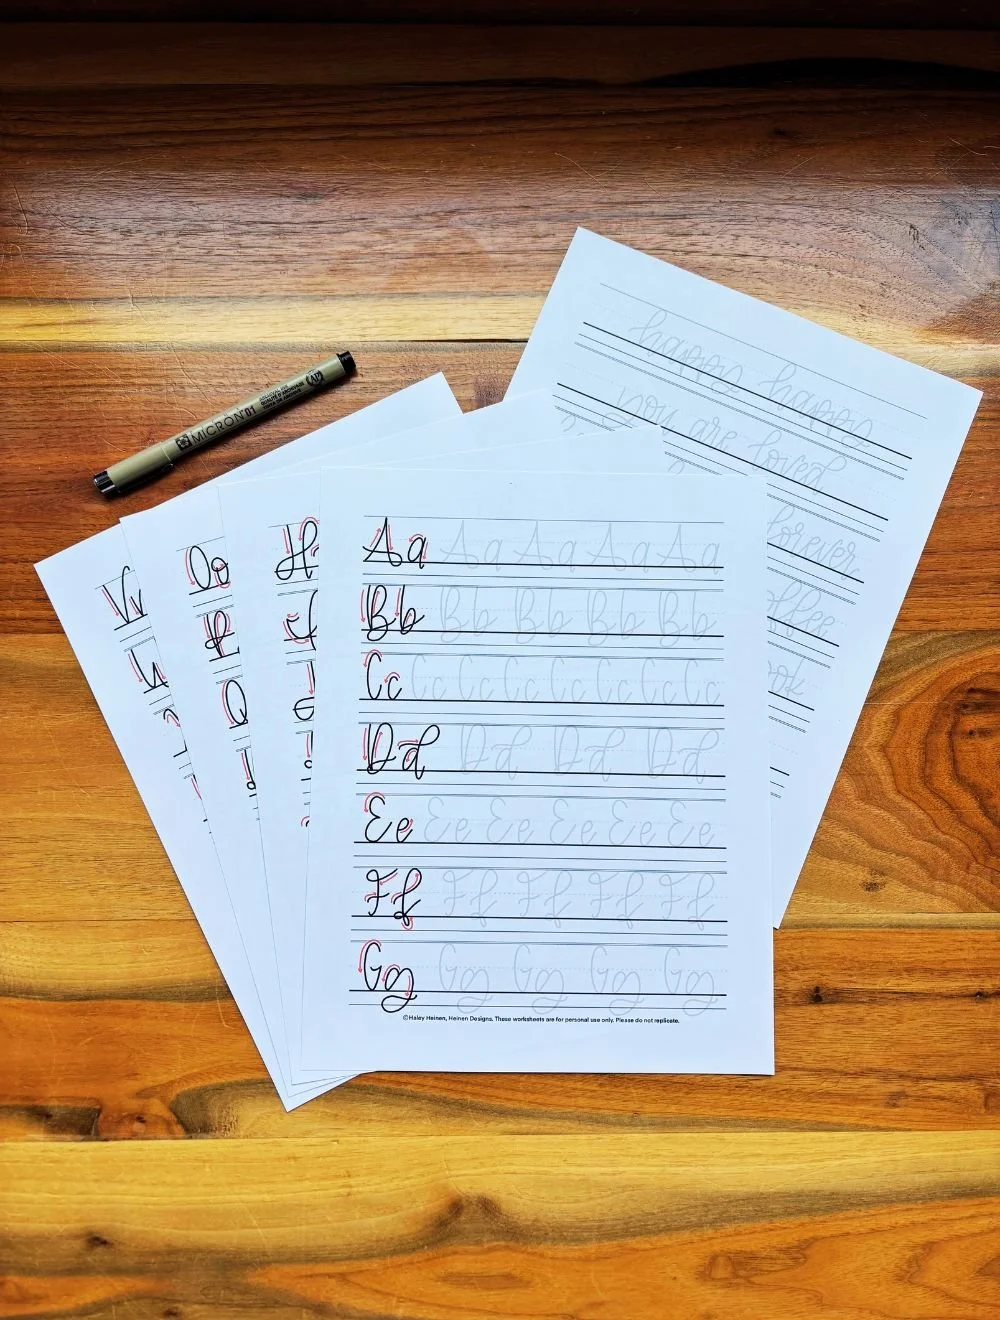
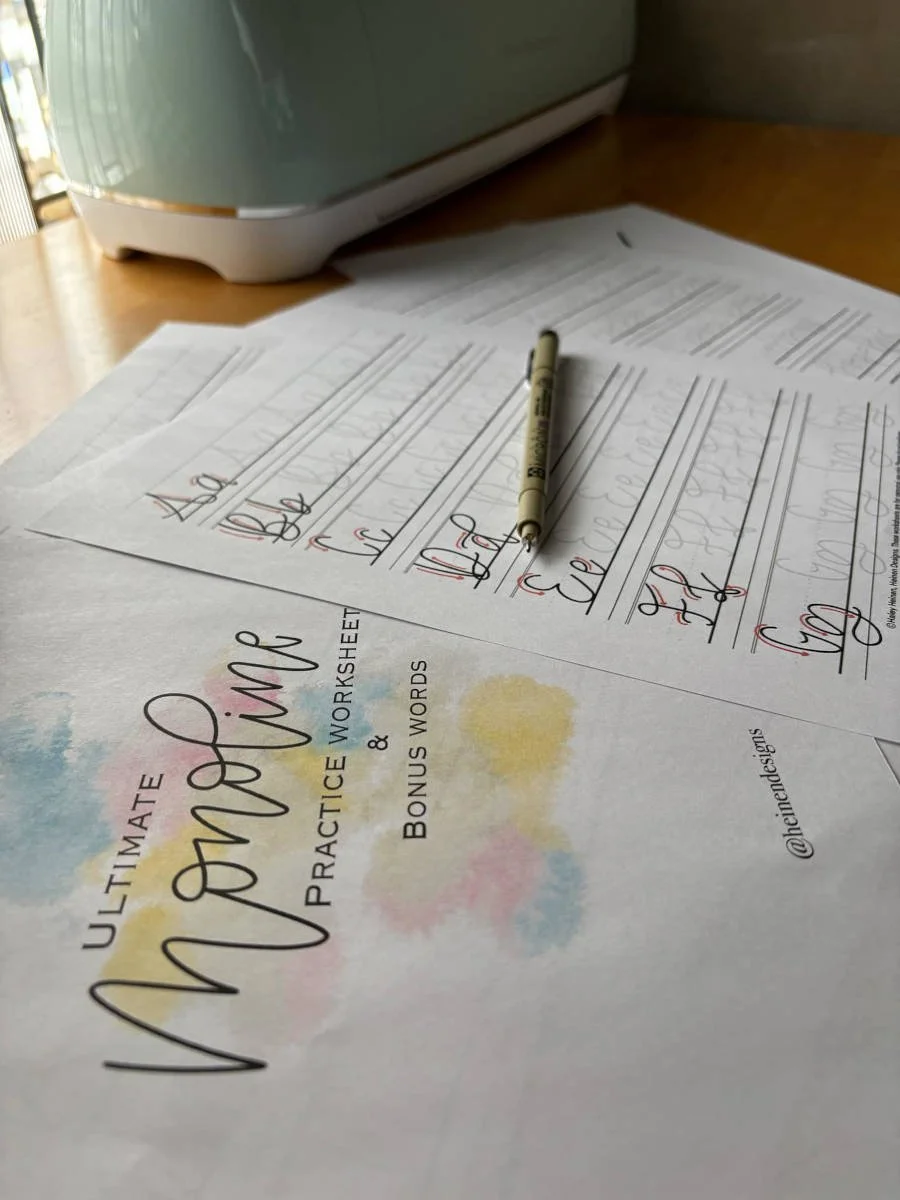
Step 7: Use Structured Worksheets to Make Practice Easy
Even with a simple approach, it can be hard to know what to practice next or how to practice it correctly. That’s where traceable hand-lettering worksheets come in.
Worksheets remove the guesswork. They provide structure, pacing, and clear visual guidance so you’re not just scribbling letters at random. With the right set of worksheets, you can follow a smooth, step-by-step progression that builds your skills one layer at a time.
Why Worksheets Make the Process Easier:
Hand-lettering worksheets show you what “good” looks like. You’re not guessing about proportions or letter spacing. You’re copying a clean, intentional example.
They build confidence fast. Tracing lets you focus on rhythm and muscle memory without worrying about perfection.
They save time. You don’t have to plan your own practice sessions. Just open the worksheet and start.
They track your progress. You can compare your early attempts with later ones and see visible improvement.
Think of worksheets like a personal coach on paper. They keep you focused, help you avoid mistakes, and encourage steady growth.
Want the Easiest Way to Start?
We’ve created a beginner-friendly monoline calligraphy workbook designed specifically for this style. Each sheet walks you through the alphabet with traceable letters, connection drills, and simple words — perfect for fast, low-frustration learning.
Also, don’t forget to grab your FREE monoline lettering worksheet here →
Calligraphy Can Be Simple & Still Beautiful
Learning hand-lettered calligraphy doesn’t have to be fancy, frustrating, or expensive.
If you want to learn fast with the least possible resistance, monoline is your best bet.
Here’s your easy-start plan:
Pick one monoline pen
Learn lowercase letters
Practice consistent drills
Connect into real words
Stick to 10–20 minutes a day
Use worksheets to stay on track
You’ll be surprised how quickly your lettering improves and how much you enjoy the process when it’s stripped down to just what works.